Windows Formatting Guide for Total Beginners - Part 2: Doing the Format


- 컴알못 초보자를 위한 윈도우 포맷하는 법 -1.부팅디스크 만들기
- 컴알못 초보자를 위한 윈도우 포맷하는 법 -2.포맷하기
- 컴알못 초보자를 위한 윈도우 포맷하는 법 -3.윈도우 설치 | 재설정
Did you check out Part 1??
I gave a quick rundown of why you need to make a boot disk
and how to actually make one.
In this post,
we're going to get into
the real deal
and cover both how to format your drive and how to install Windows.
2> Formatting
What you'll need: a bootable USB (with the Windows installer on it)
The first time you power on the computer,
you need to boot from the USB instead of the hard disk.
First, plug the USB you prepared into your computer.
Next, go into the BIOS settings and set the boot order.
(By the way, you can configure hardware settings from the BIOS.)
This part can be a little confusing.
Since the BIOS interface differs
depending on the motherboard manufacturer,
I'll walk you through it case by case.
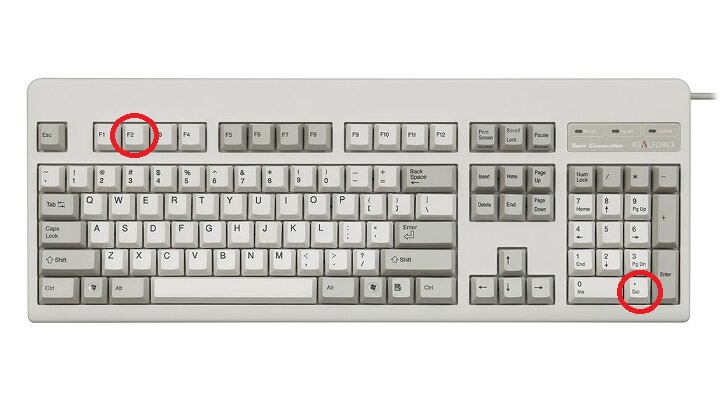
You usually get in by pressing the Del key or the F2 key.
Tap the Del key or F2 key repeatedly right after turning on the computer to enter it.
- MSI boards
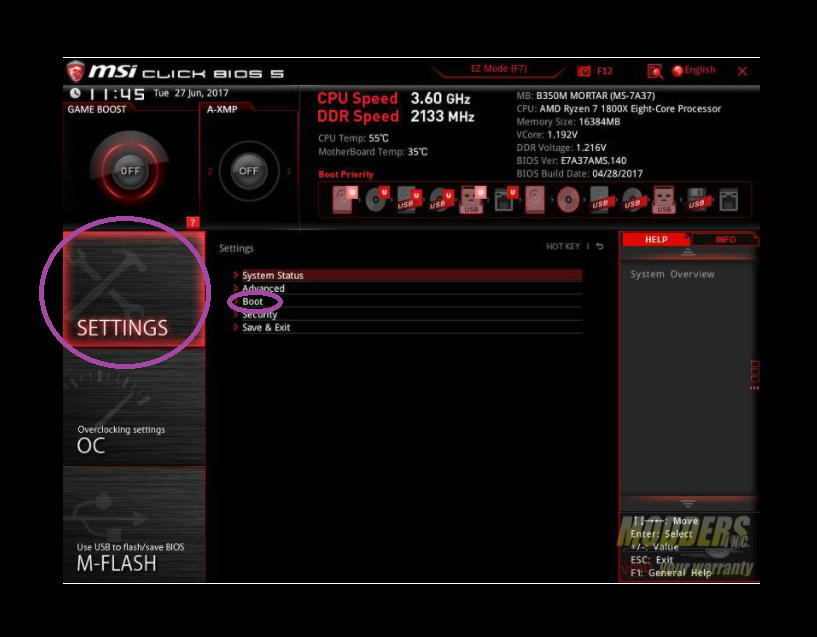
If your computer's motherboard is made by MSI,
you'll land on a screen like this.
Go into the Settings menu and select the Boot menu.
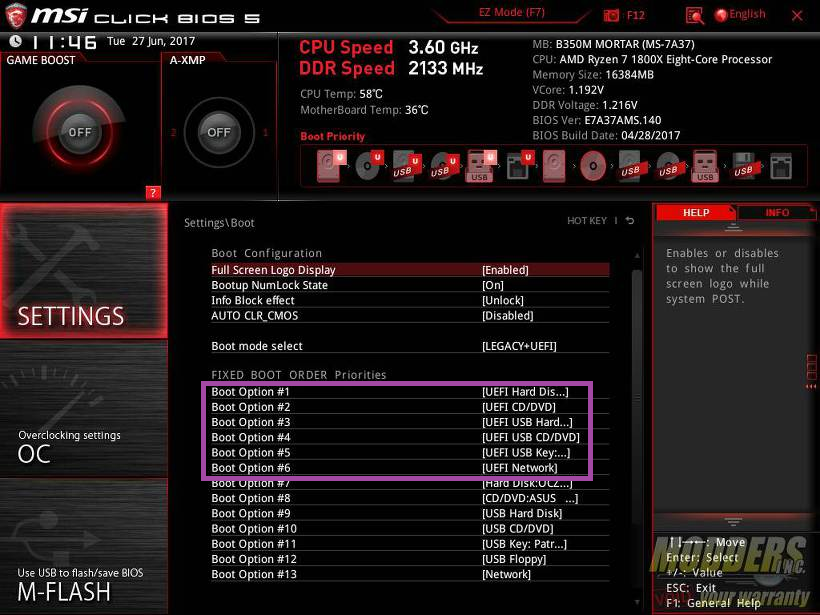
You'll see Boot Option #1 and onward, listed in order.
These numbers represent the boot order.
It tries to boot from #1 first, and if that fails, moves to #2, then #3, and so on.
That's how the priority is set.
Since we need to boot from USB first,
set Boot Option #1 to USB
and Boot Option #2 to Hard Disk (or SSD).
You can move through the menu with the arrow keys and press Enter to select.
Once you've set that,
press Esc to go back to the previous menu,
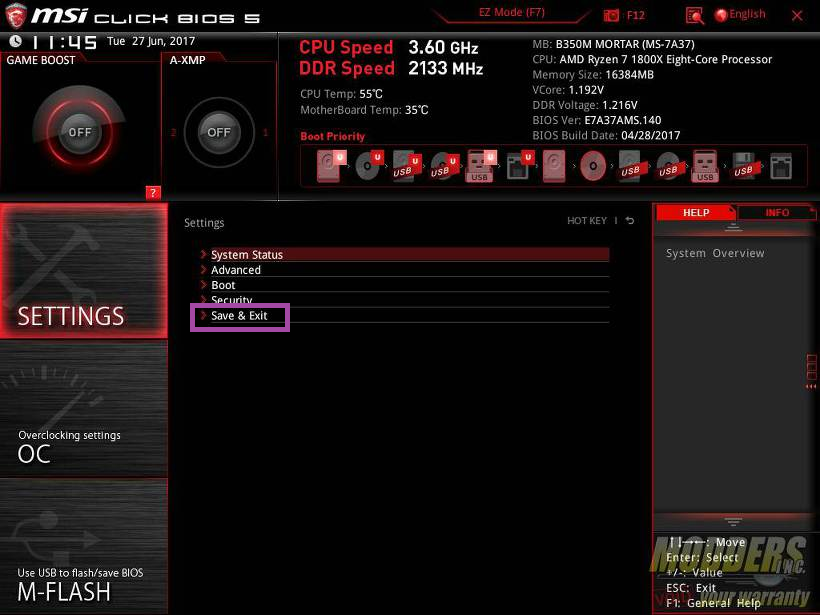
then Save & Exit, and you're done.
- Gigabyte boards
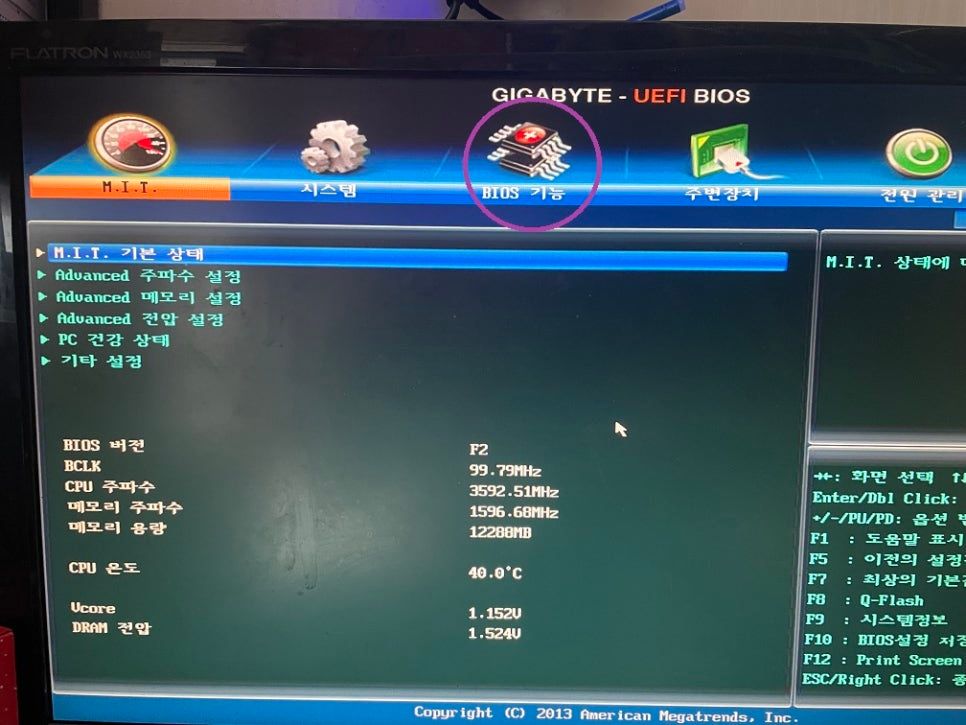
For reference, my computer uses a GIGABYTE motherboard.
The interface looks different, right?
But what you need to do here is the same.
It's a bit easier since it's in Korean on mine, haha.
Go into the BIOS Features menu at the top.
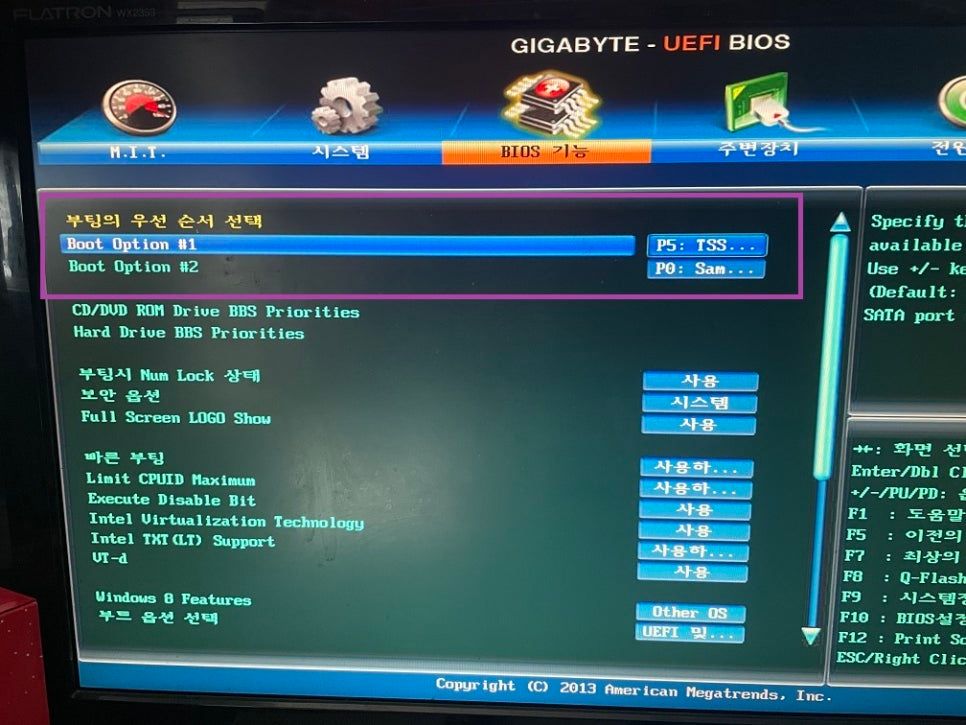
This is where you set the boot priority.
#1 is first priority, #2 is second priority.
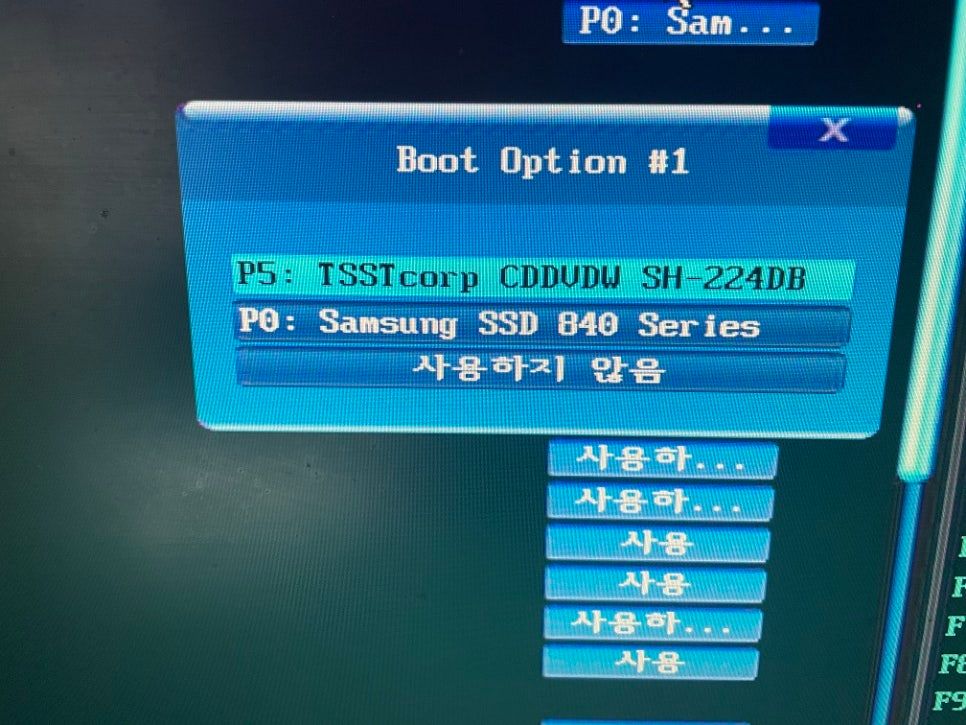
Once selected, the bootable devices show up.
I only have a CD drive and an SSD installed, so I can only pick between those two.
Reminds me of the old Windows XP days when I used to boot from a CD drive, haha.
(Back in my day...)
Once you plug in the bootable USB you prepared, it becomes active and selectable.
Set first priority to USB and second priority to HDD (hard disk) or SSD.
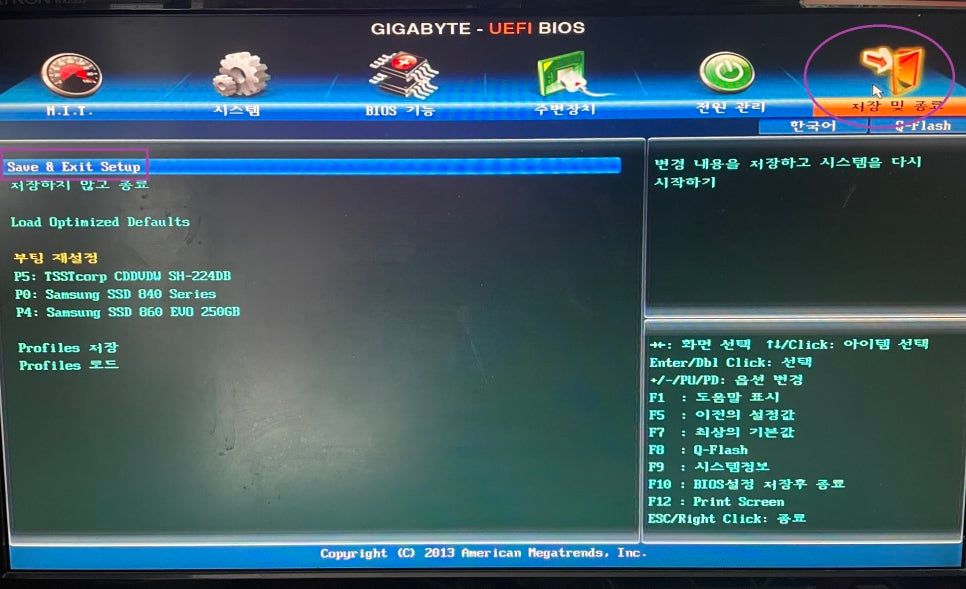
And finally, go into the "Save & Exit" menu
and select Save & Exit Setup to finish.
Done.
Other manufacturers can be set up in a similar way.
The interface may differ,
but the key point is "setting the boot priority."
Once the boot priority is set to USB,
the computer will start booting from the USB.
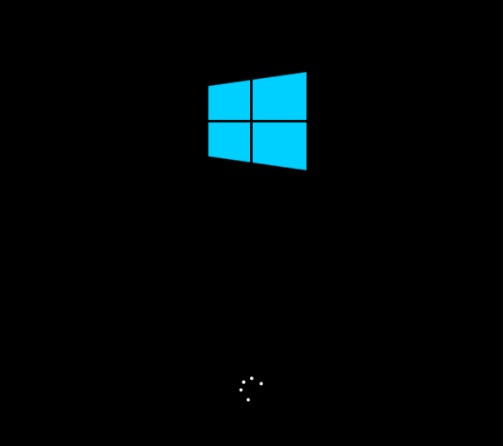
Like this.
Wait a moment
and you'll see the next screen.
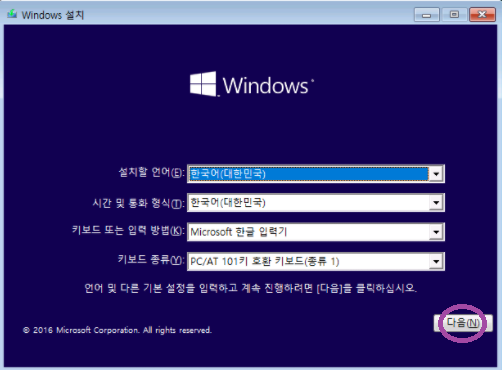
Choose your language, time, and keyboard type,
then click Next.
Here's a handy tip!
You can click it with your mouse,
but notice the (N) next to "Next"?
That's the keyboard shortcut for that button.
In other words, on your keyboard,
pressing Alt + N is the same as clicking the Next button.
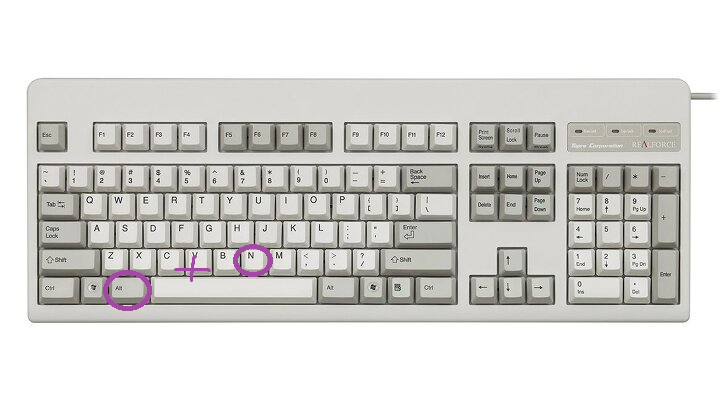
If you're ever in a real bind without a mouse,
it's good to know you can do it with the keyboard too.
While I'm at it, here's another handy tip.
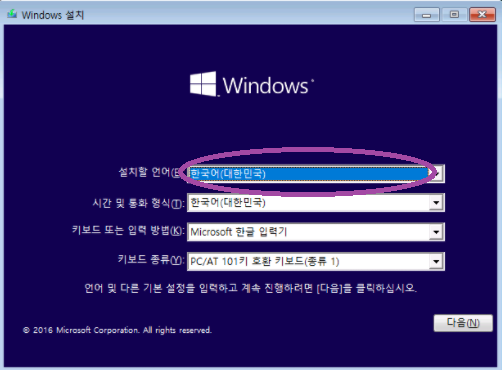
Notice how, unlike the other items, only the menu next to the language to install is highlighted in blue?
That indicates where the cursor is currently focused.
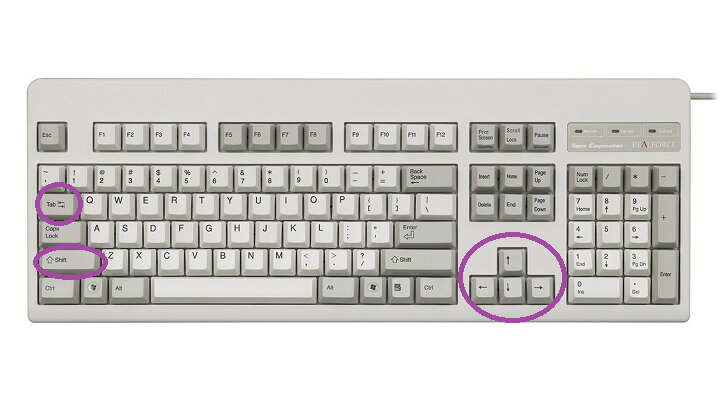
Pressing Tab moves the cursor to the next item,
and pressing Shift + Tab moves it to the previous item.
The keyboard doesn't move between menus,
but lets you select sub-items within the currently focused menu.
By the way, the shortcut concept I just explained
applies not only during Windows installation
but works the same way whenever you use a computer,
so it's worth building the habit of using shortcuts.
It makes things a lot more convenient, haha.
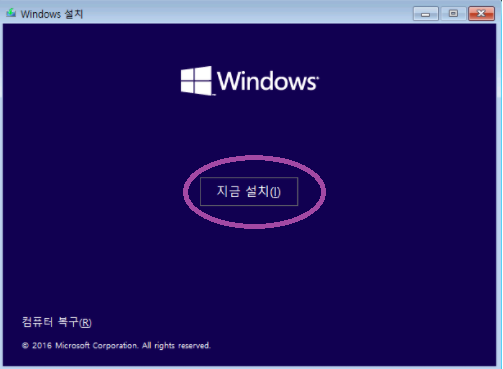
Alright, back to the main topic.
When you press "Next,"
you'll see a screen like this.
Click Install now.
(As a shortcut, that would be Alt + I, right?)
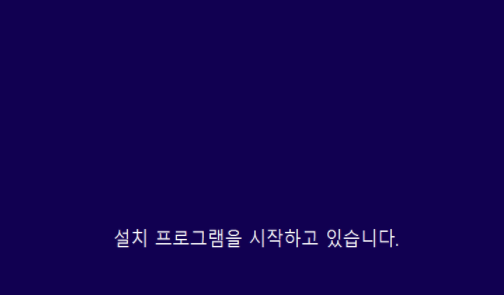
The installation will begin.
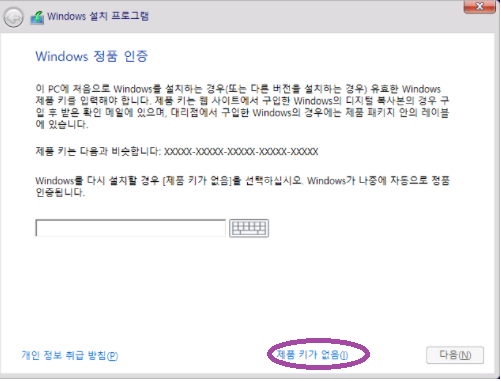
You'll be asked to enter your product key,
and if you don't have one on hand right now,
just click "I don't have a product key" at the bottom.
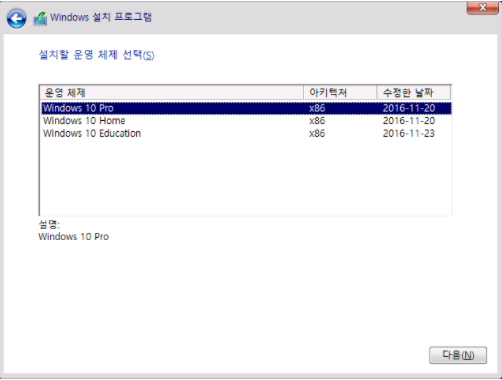
Then choose which OS edition to install.
Pro and Home editions have some functional differences, and different prices too.
For reference, Windows' built-in Remote Desktop feature
is available in Pro but not included in the Home edition.
After picking the edition and clicking Next,
you'll be asked to accept the license terms.
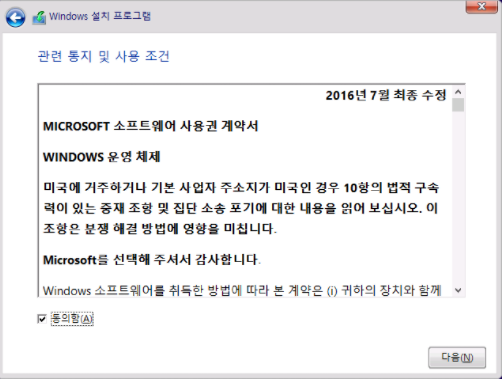
Click Accept and move on.
(If you're using shortcuts, you can press Alt + A to check Accept and Alt + N to move to Next.)
Writing all this out, I've turned into quite the nag, haven't I...
Shortcuts are just so great, please make good use of them,
and enjoy your PC setup, haha.
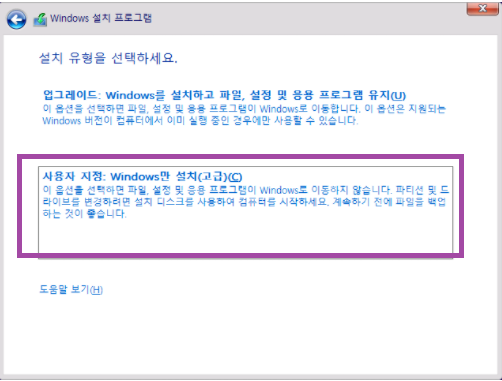
You'll be shown a menu asking you to choose the installation type.
Since we're doing a format here,
select Custom.
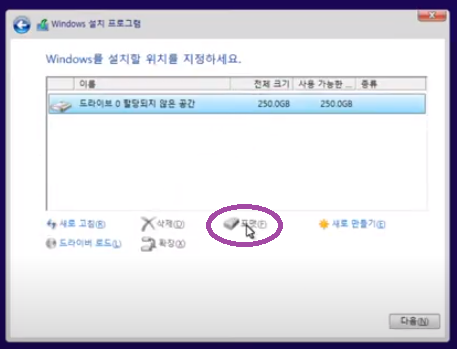
Now you'll see the menu for choosing where to install Windows.
This part is the most important.
All the storage devices installed (hard disks, SSDs) will be shown here.
Each device is labeled Drive 0, Drive 1, and so on.
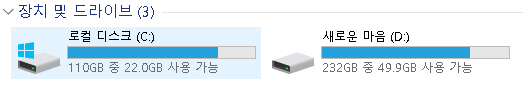
For reference, as you use a computer,
it's common to split it into a C: drive and D: drive,
keeping backup files on the D: drive.
When installing Windows for the first time,
you need to divide up the disk space like this.
If you actually have two hard disks installed,
they'll automatically be split into C: and D: drives even without doing anything extra.
But sometimes you only have one hard disk and still want to split it into C: and D: drives.
In that case, it's called "partitioning."
It's physically one device, but it's logically (as far as the computer recognizes it) split into two.
So how do you do that?
Let me walk you through it now.
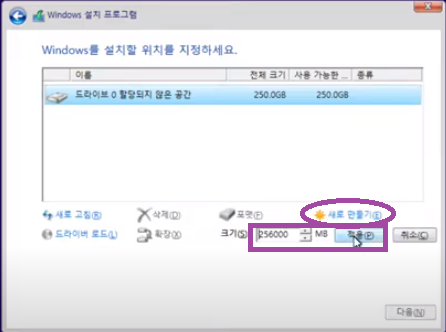
Select the drive you want to partition
and click New.
Then you can allocate a size below;
if you set it equal to the full size,
the entire drive becomes one single partition.
Set the size you want to split off and click Apply,
and the partition will be created.
Next, select the drive where Windows will be installed and click Next.
Here, the drive where Windows gets installed becomes the C: drive, and the remaining space becomes the D: drive.
If this is confusing, feel free to leave a comment~
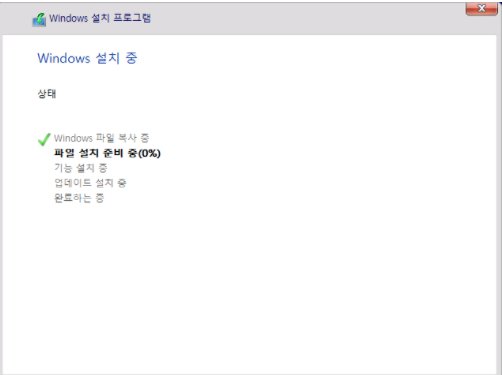
Now the Windows installation will proceed.
Once the installation is complete,
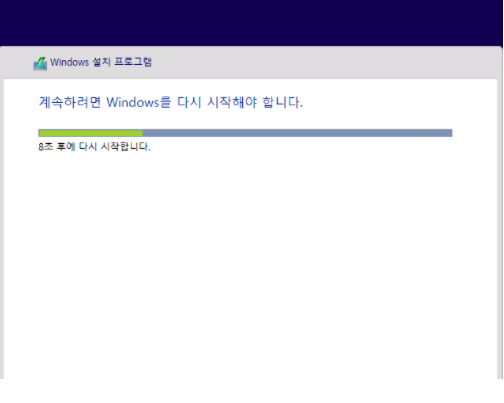
the computer will restart.
That covers the formatting process.
To sum up what we've done so far,
it was the process of installing the Windows files from the bootable USB onto the hard disk.
Once the installation is done, go ahead and remove the bootable USB.
All that's left is for Windows, now saved on the hard disk, to finish installing.
Remember earlier, we set the boot priority to #1 USB, #2 hard disk?
We need to go back into the boot options,
just like we explained earlier,
and reset the boot order,
setting #1 to the drive you just installed Windows on.
Wondering if it's a big deal if you don't change it?
It's not, actually.
Even if you leave the bootable USB plugged in and reboot without changing the priority,
the Windows installation files are already saved on the hard disk,
so you can simply remove the USB and reboot :)
- Continued in Part 3.
댓글 0